
Users
Invite teammates to your organisation and control exactly what each of them can do under Settings → Users.
The users list
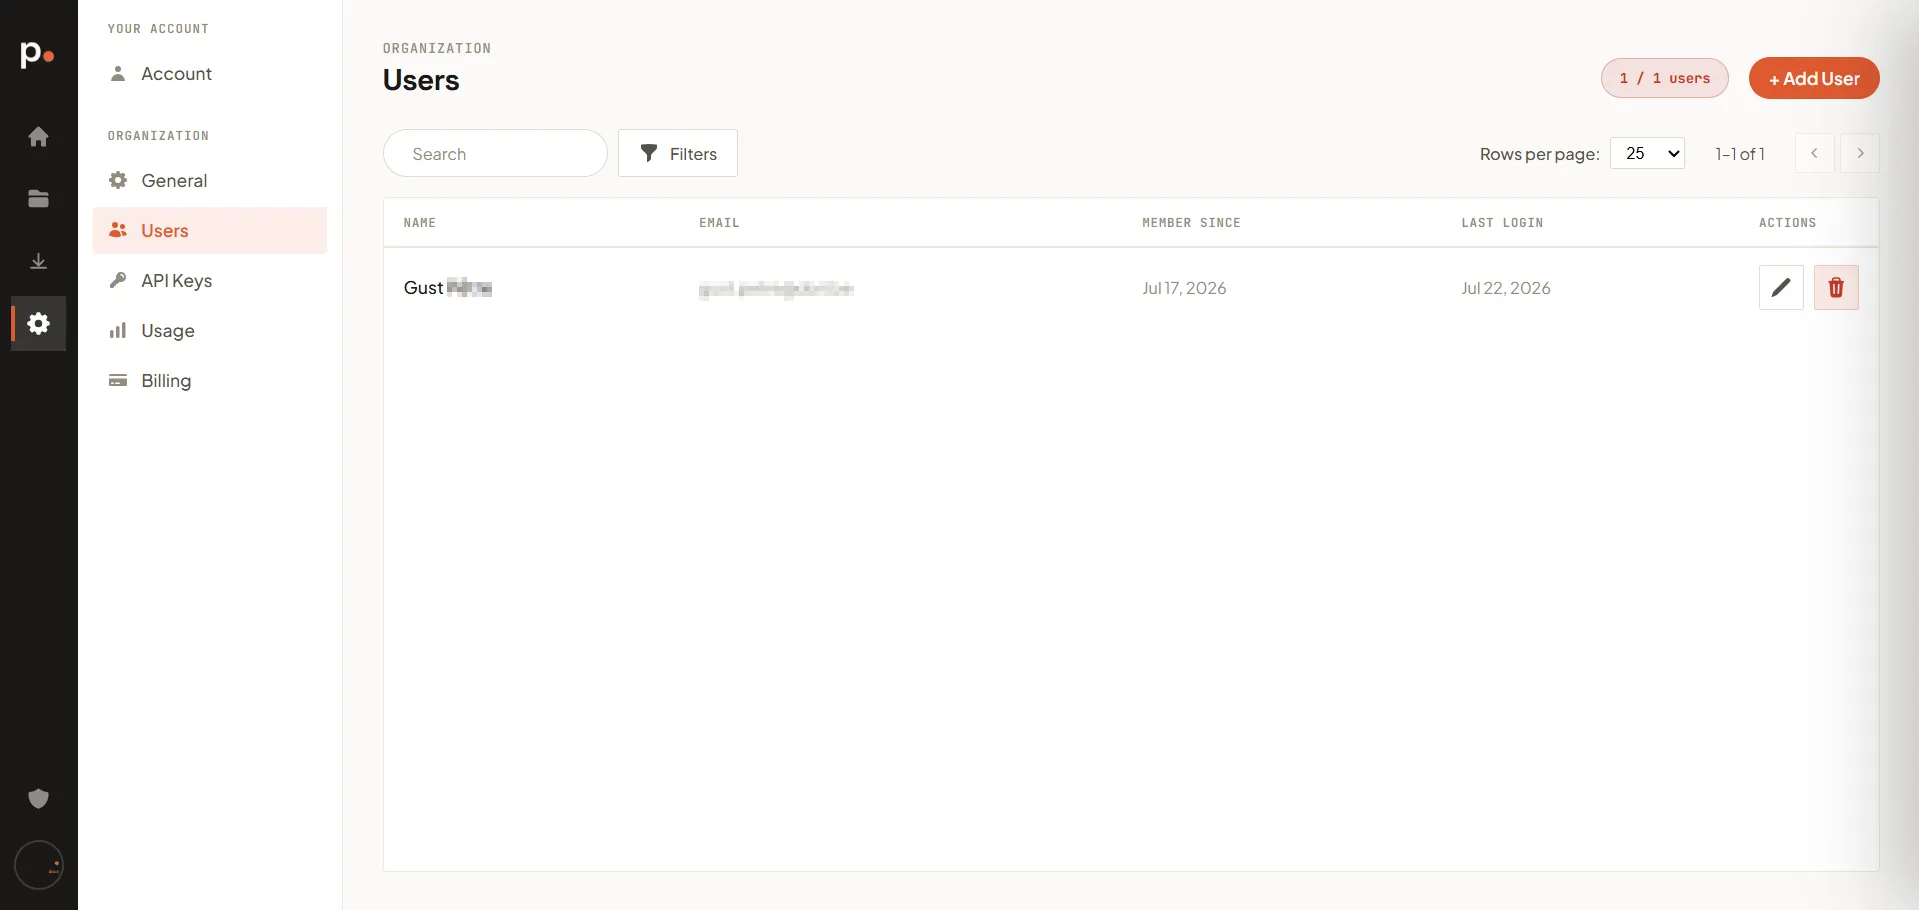
Section titled “The users list”Each row shows a user’s Name, Email, Member since date, and Last login. Your own row is marked so you can spot it easily.
The counter next to + Add User (for example, “1 / 1 users”) shows how many users you have against your plan’s limit. You can add users beyond it — each one becomes a paid seat, charged on top of your plan price. See Billing for what a seat costs and when it’s charged.
Adding a user
Section titled “Adding a user”- Click + Add User.
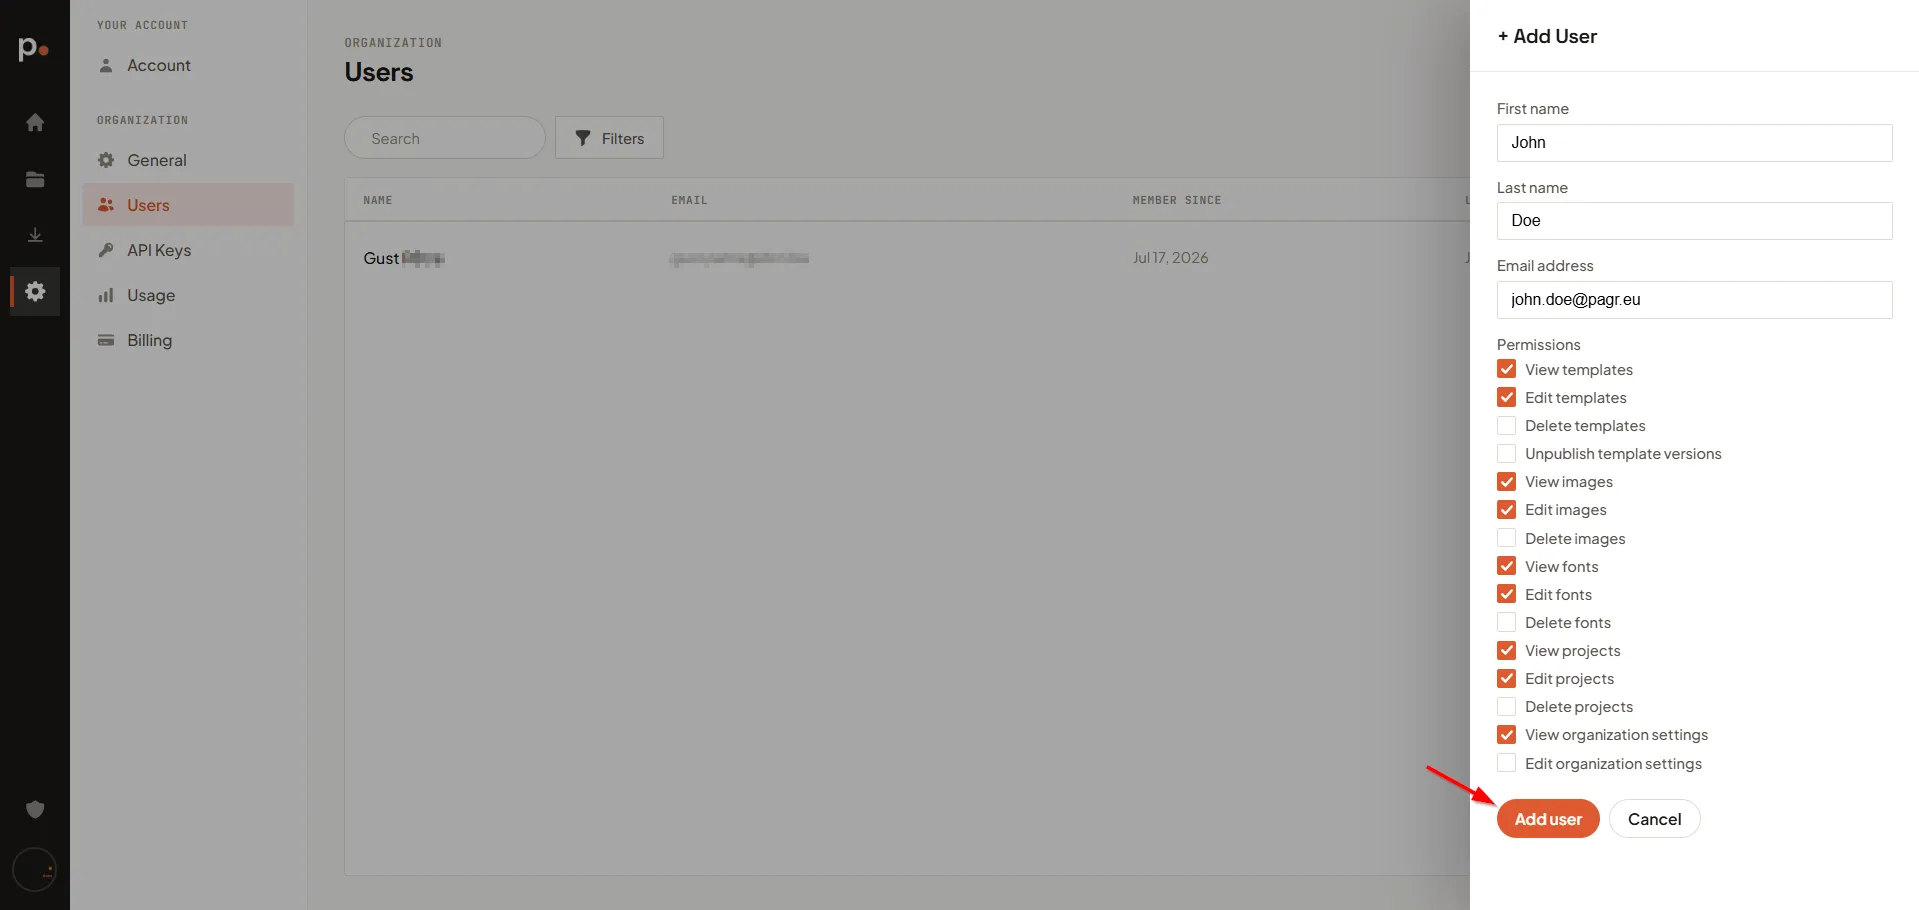
- Enter their First name, Last name, and Email address.
- Choose their Permissions (see below).
- Click Add user.
If your plan’s included seats are all in use, the panel says so and quotes the cost before you commit: the seat is charged pro-rata for the days left in the current billing period, and then added to your subscription charge on every renewal after that. You confirm the exact amount — “Adding this user charges € 4.13 (VAT included) to your payment method now, and € 8.00 per month on every renewal after that.” — before anything is charged.
Permissions
Section titled “Permissions”Permissions are granular, so you can give each person exactly the access they need. For each area you can grant the ability to view, edit, or delete:
- Templates — including a separate permission to unpublish template versions.
- Images (the image gallery)
- Fonts
- Projects
- Organization settings — view and edit the organisation-wide settings.
Managing existing users
Section titled “Managing existing users”Use the pencil icon in the Actions column to change a user’s details or permissions, and the trash icon to remove them from the organisation.