
Edit from the preview
The preview isn’t just a picture of your document. Every element in it is clickable: hover over a heading, a table, or a logo and Pagr shows you what it is and what you can do with it. This is the fastest way to change one specific thing without describing where it lives or hunting for it in the template definition.
It works in both Studio and Canvas, because both views share the same preview.
Hovering: what am I looking at?
Section titled “Hovering: what am I looking at?”Move your cursor over the preview and the element under it is outlined, with a small action bar in its top-left corner holding the things you can do to it.
When your cursor sits over more than one element at once — a piece of text, inside a column, inside a row — a breadcrumb appears above the action bar as well, showing that nesting, for example row > text. Over a single element you’ll just see the action bar.
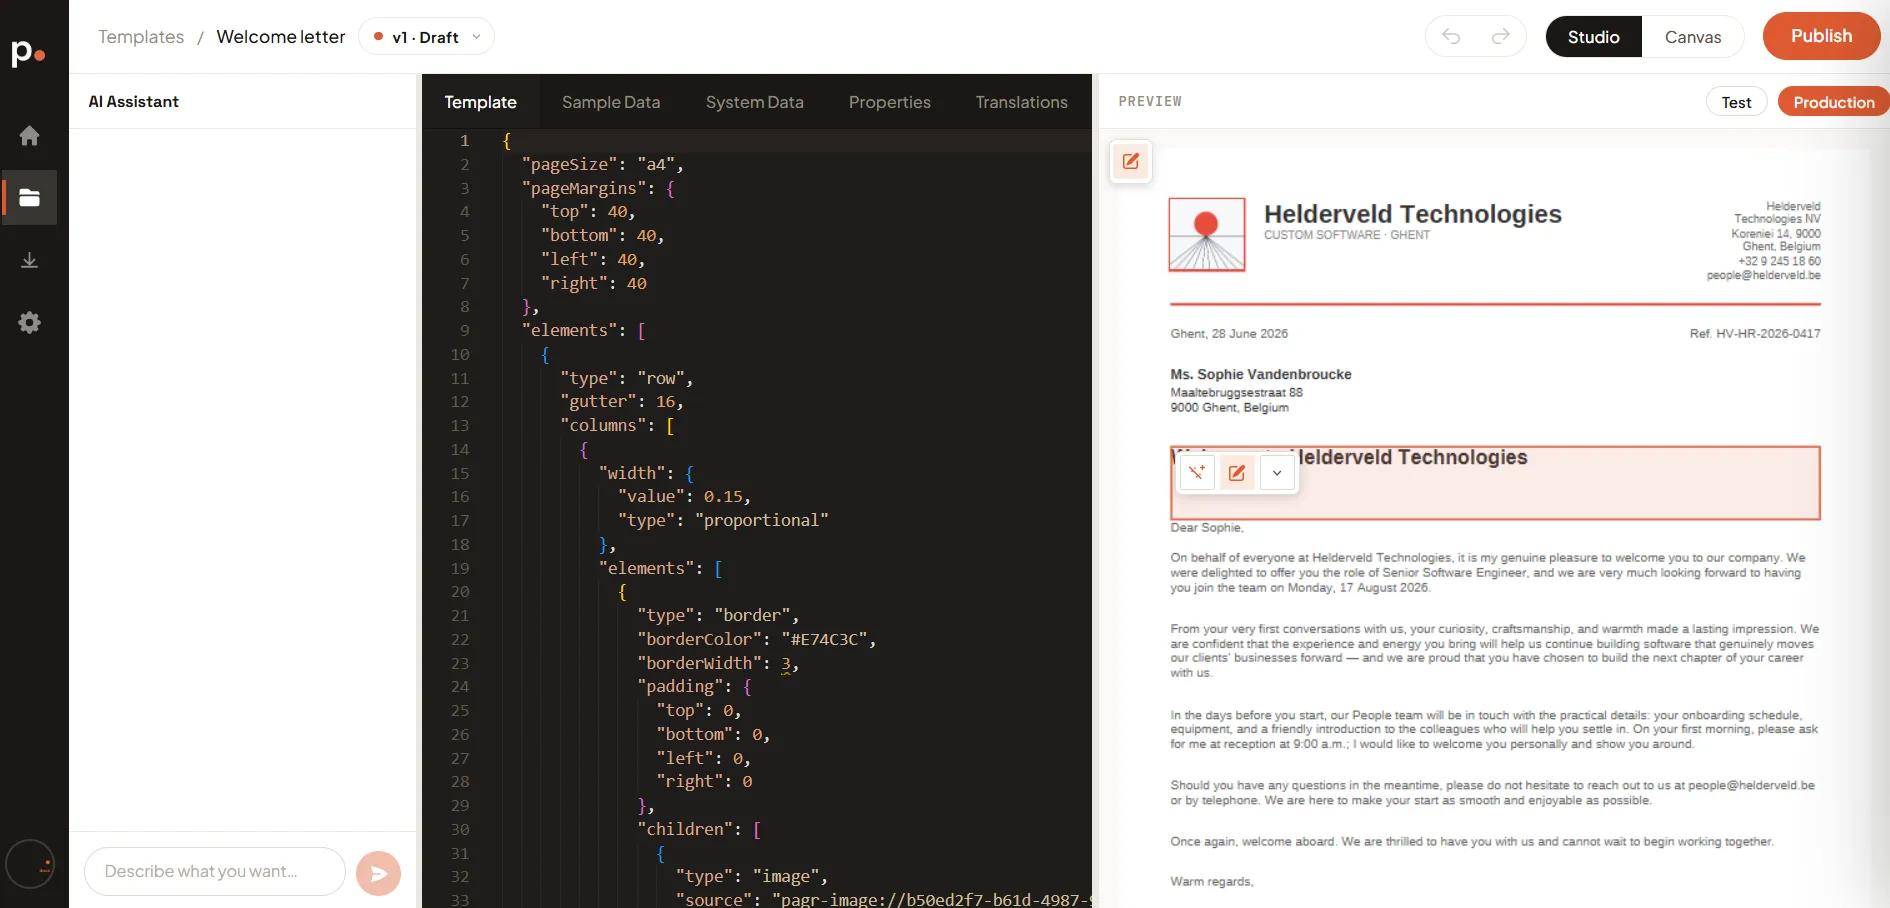
The breadcrumb only appears when the element is nested inside others — which is most of the time, since documents are built from rows and columns. It matters because your cursor is often over several elements at once: a piece of text, inside a column, inside a row.
Click a crumb to select that level instead. The selected crumb is highlighted, and the action bar updates to act on it. So if you meant to move the whole row rather than the text inside it, click row in the breadcrumb first.
The three actions
Section titled “The three actions”Ask AI about this element
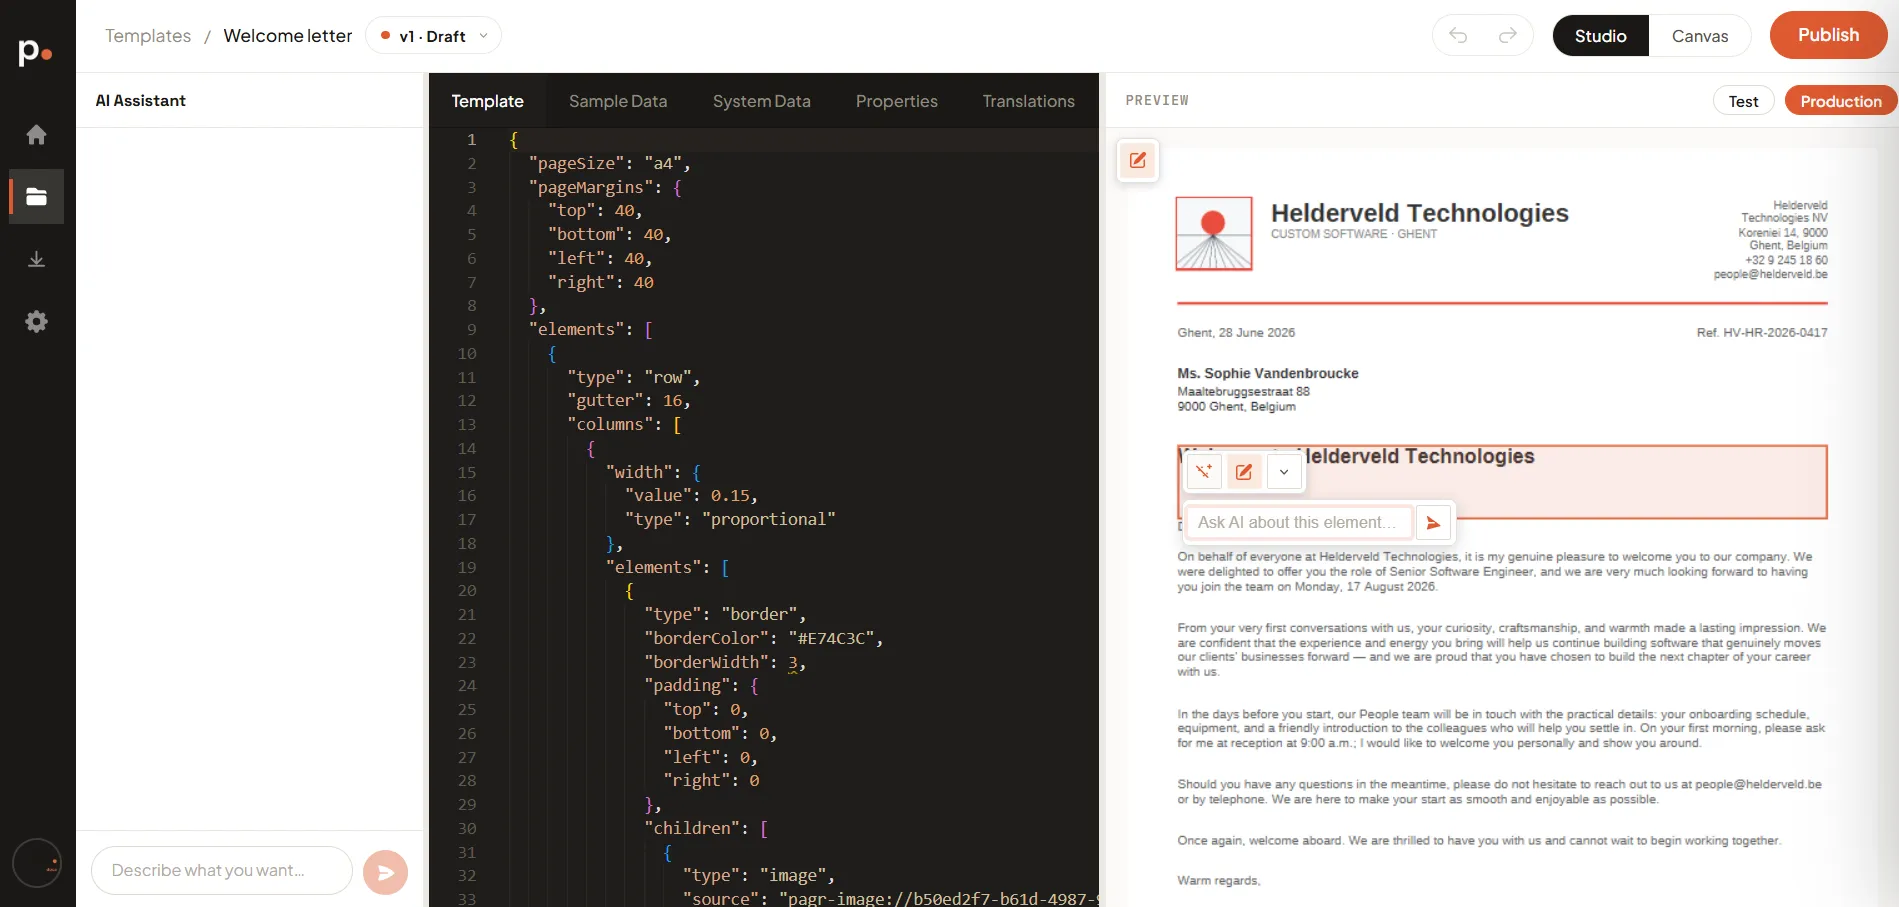
Section titled “Ask AI about this element”The sparkle icon opens a small text box, right under the element, with the placeholder “Ask AI about this element…”.
This is the same AI Assistant as the panel on the left, but scoped to what you clicked. That makes prompts much shorter and much more reliable: instead of “make the invoice number in the top-right bold and dark blue”, you point at it and say “make this bold and dark blue”.
It’s always available, on every element.
Edit content
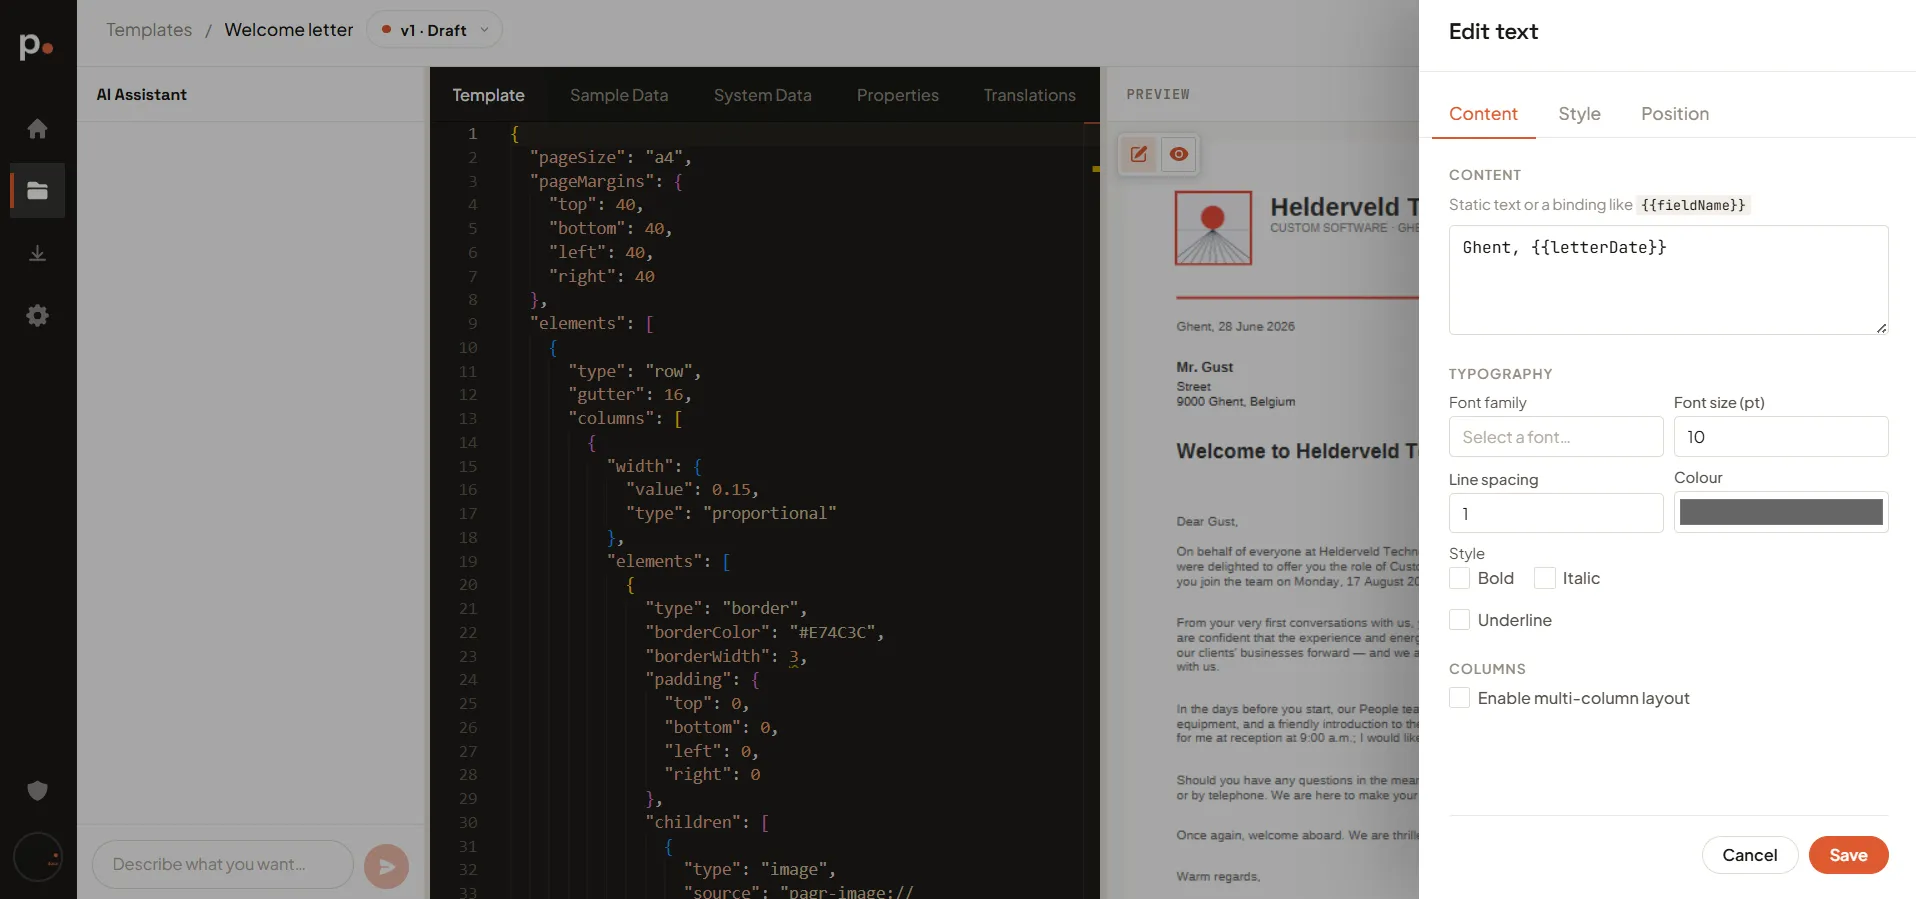
Section titled “Edit content”The pencil icon opens a full property editor for the element — no AI, no prompt, no JSON. The panel is titled for the element type you clicked: Edit text, Edit image, and so on. Whatever the type, it has the same three tabs, and Cancel / Save at the bottom.
It appears for elements that have something to edit: text, html, image, table, checkbox, qrCode, separator, shape, border, row, and pageBreak. On an element with nothing to edit, the pencil simply isn’t shown.
Content
Section titled “Content”What the element actually shows.
For a text element that’s the text itself — and it doesn’t have to be static. You can mix words with bindings, so Ghent, {{letterDate}} renders as “Ghent, 28 June 2026” with the date coming from your data. Below it sit the typography controls: font family, font size in pt, line spacing, colour, and bold / italic / underline. There’s also an Enable multi-column layout option.
For an image, the Content tab holds the source instead — a URL, a binding like {{imageUrl}}, or Browse… to pick from your Image Gallery — plus max width and max height constraints in pt.
Presentation, independent of content:
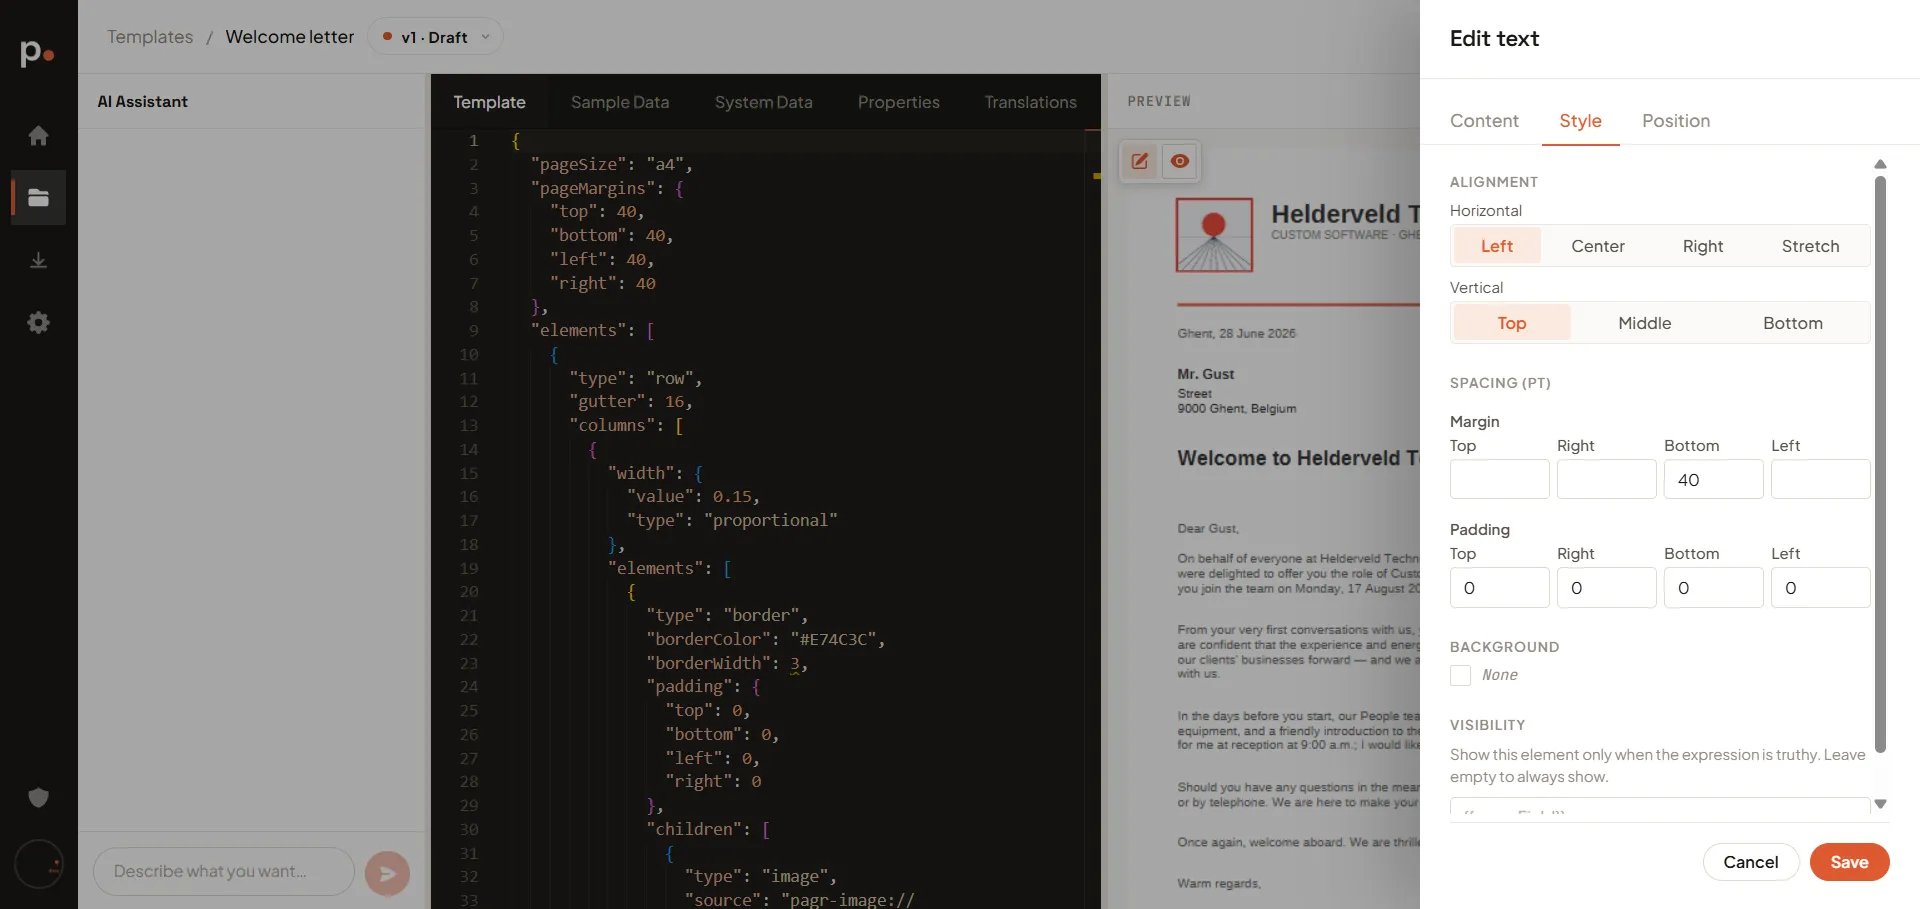
- Alignment — horizontal (Left, Center, Right, Stretch) and vertical (Top, Middle, Bottom).
- Spacing — margin and padding, per side, in pt.
- Background — a fill, or None.
- Visibility — an expression that shows the element only when it’s truthy. Leave it empty and the element always shows.
That last one is worth knowing about: it’s how you make a block conditional — a “paid” stamp that only appears when a flag is set, a discount line that only appears when there is a discount — without touching the template definition.
Position
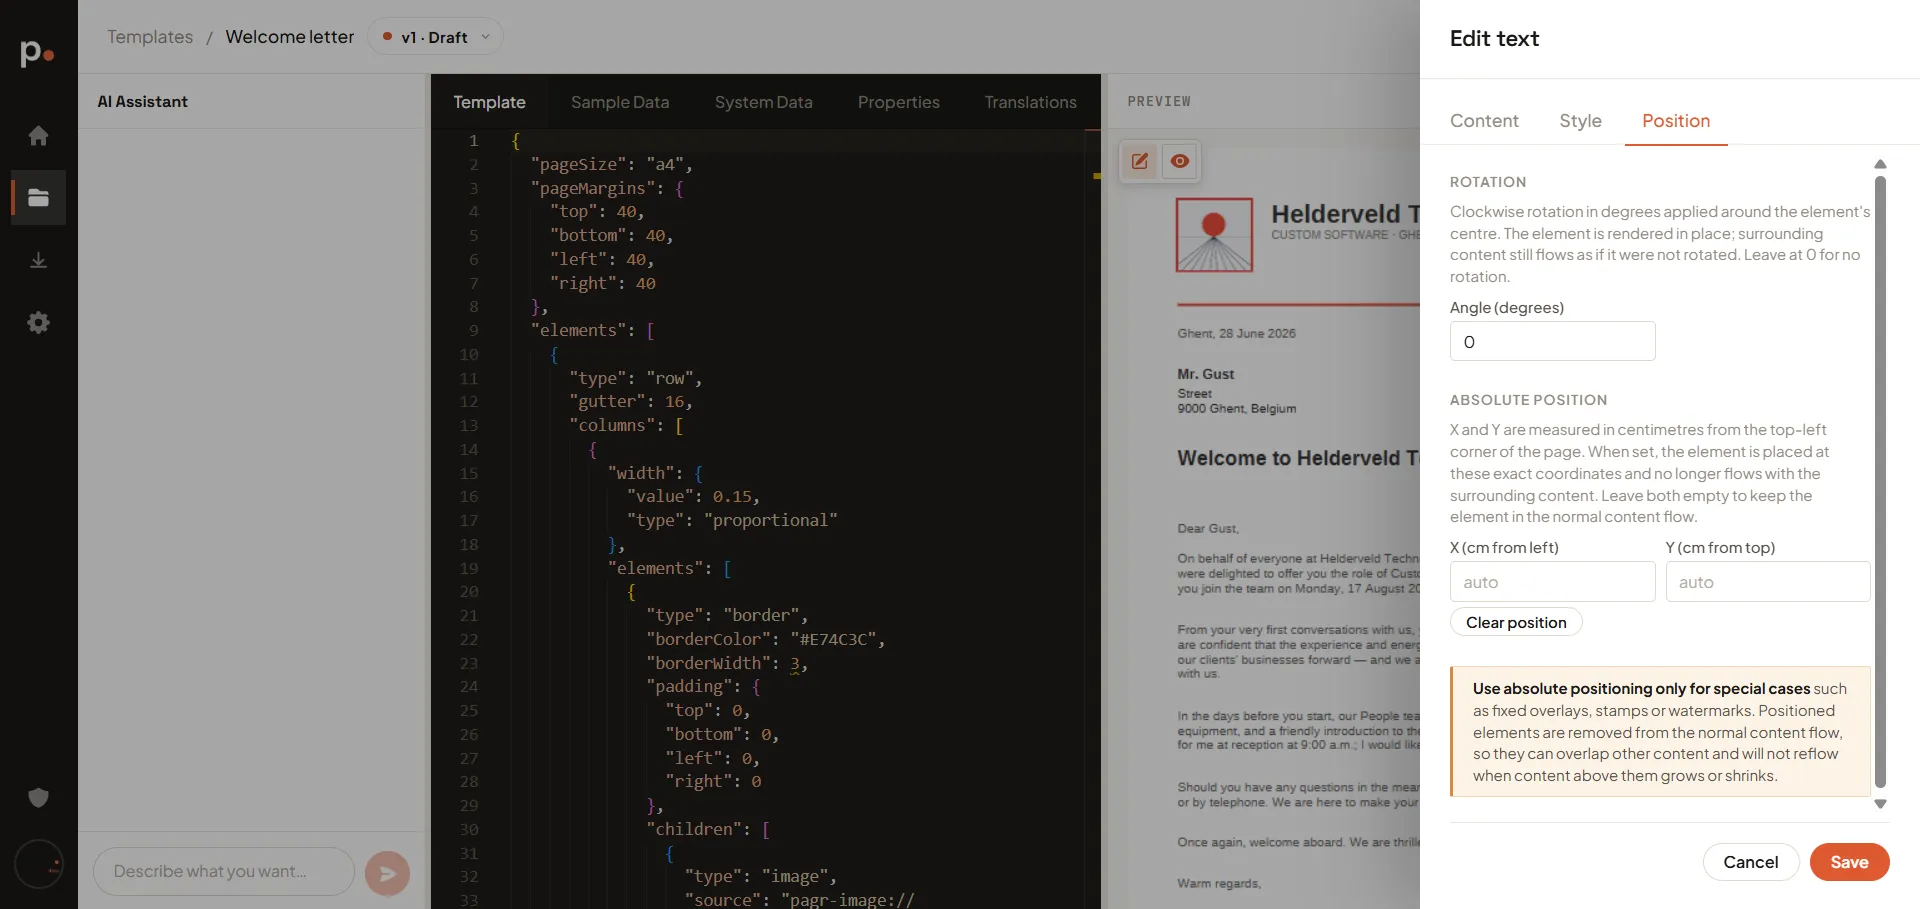
Section titled “Position”- Rotation — a clockwise angle in degrees around the element’s centre. The element still occupies its normal place in the layout; surrounding content flows as if it weren’t rotated. Leave it at
0for none. - Absolute position — X and Y in centimetres from the top-left corner of the page. Set them and the element is pinned to those exact coordinates. Clear position puts it back into the normal flow.
The same settings in the JSON
Section titled “The same settings in the JSON”Every field here writes to the template definition, so you can move between the form and Studio freely. A few of the labels differ from the property names, which is worth knowing before you go looking:
| In the form | In the template JSON |
|---|---|
| Visibility | condition — see Conditions |
| Absolute position (X, Y in cm) | position: { x, y } |
| Rotation (angle in degrees) | rotation |
| Max width / Max height (image) | maxWidth / maxHeight |
| Font size, line spacing, colour, bold, italic, underline | typography |
| Margin / Padding | margin / padding |
Visibility is the one that catches people: search the JSON for “visibility” and you won’t find it. See Template structure for the full reference.
More actions
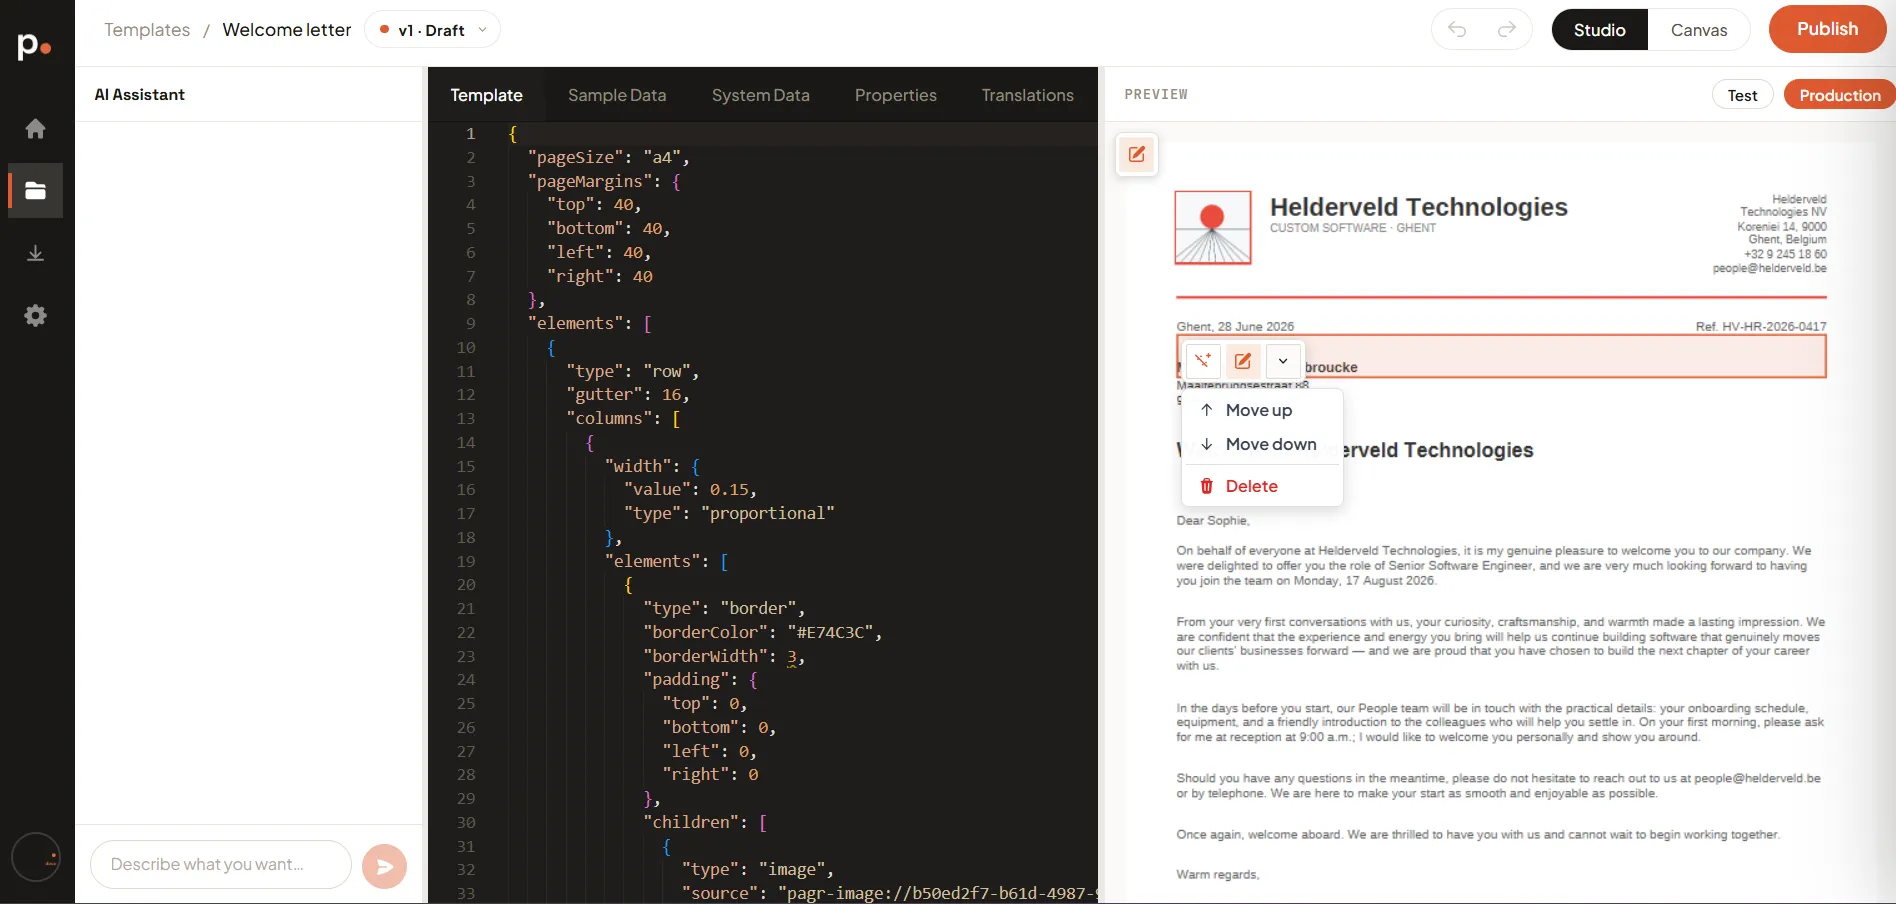
Section titled “More actions”The chevron opens a small menu with three entries:
| Action | What it does |
|---|---|
| Move up ↑ | Moves the element one position earlier among its siblings |
| Move down ↓ | Moves it one position later |
| Delete 🗑 | Removes the element from the template — shown in red |
Move up is greyed out when the element is already first among its siblings, and Move down when it’s already last — so you can see at a glance whether there’s anywhere to go.
Elements you can’t edit here
Section titled “Elements you can’t edit here”If your template is based on a Master Template, parts of the document come from the master rather than from this template. Hovering over one of those inherited elements shows no action bar at all — there’s nothing here to change, because the element isn’t part of this template’s definition.
To change an inherited element, edit the master template instead. Everything based on it picks up the change.
Every change made from the preview goes through the editor’s normal history, so the undo arrow in the toolbar reverts it — including a Delete. Nothing you do here is committed until you publish the version.
When to use this instead of the assistant panel
Section titled “When to use this instead of the assistant panel”| Situation | Best tool |
|---|---|
| Change one specific element you can see | Preview — point at it |
| Reorder or remove a block | Preview — Move up / down / Delete |
| Build a whole document, or restructure several sections | AI Assistant panel |
| Precise values — an exact margin, a hex colour, a conditional | Studio |
Related articles
Section titled “Related articles”- Studio and Canvas — the two views that share this preview.
- Writing good AI prompts — the assistant panel, and how to phrase requests.
- Editing a template by hand — the tabs behind the preview.
- Template structure — the element types you’ll see in the breadcrumb.
- Master Templates — why some elements can’t be edited from here.