
Templates
Templates are the building blocks of every document Pagr produces. A template defines the layout, styling, and content of a document, with variables for the parts that change on each render (names, dates, line items, and so on). You design a template once, then render it many times with different data.
Every template lives on the Workspace → Templates page and belongs to a project.
The templates list
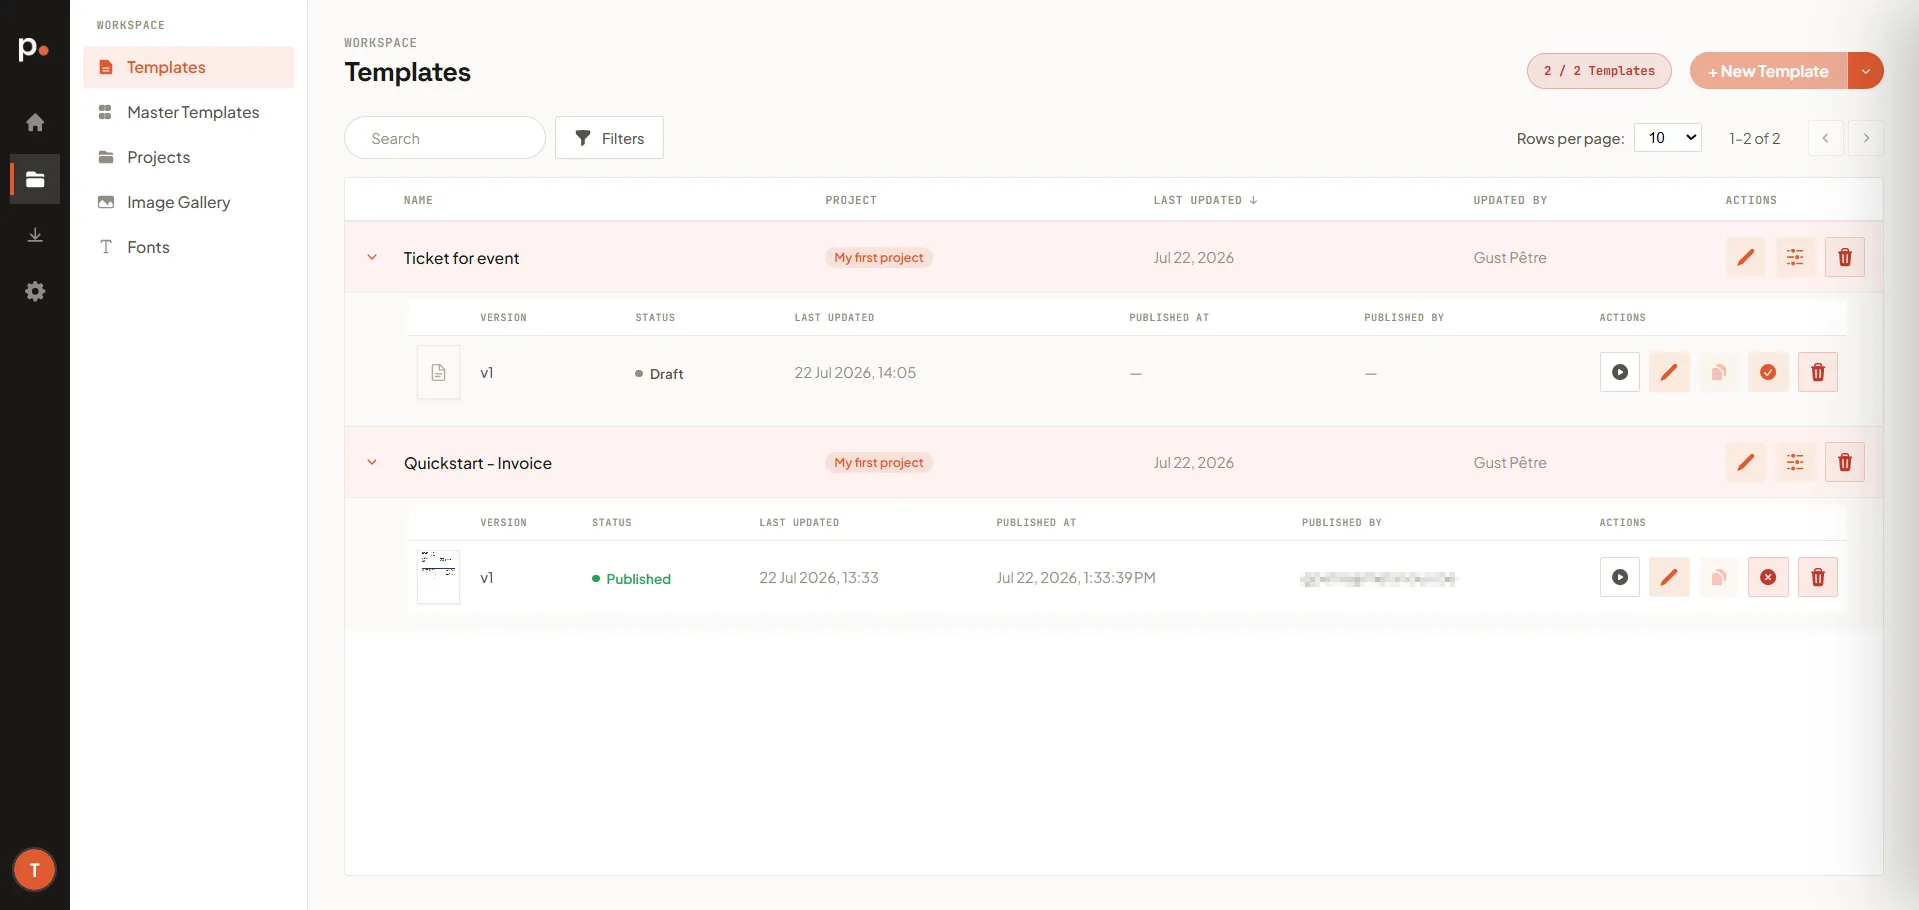
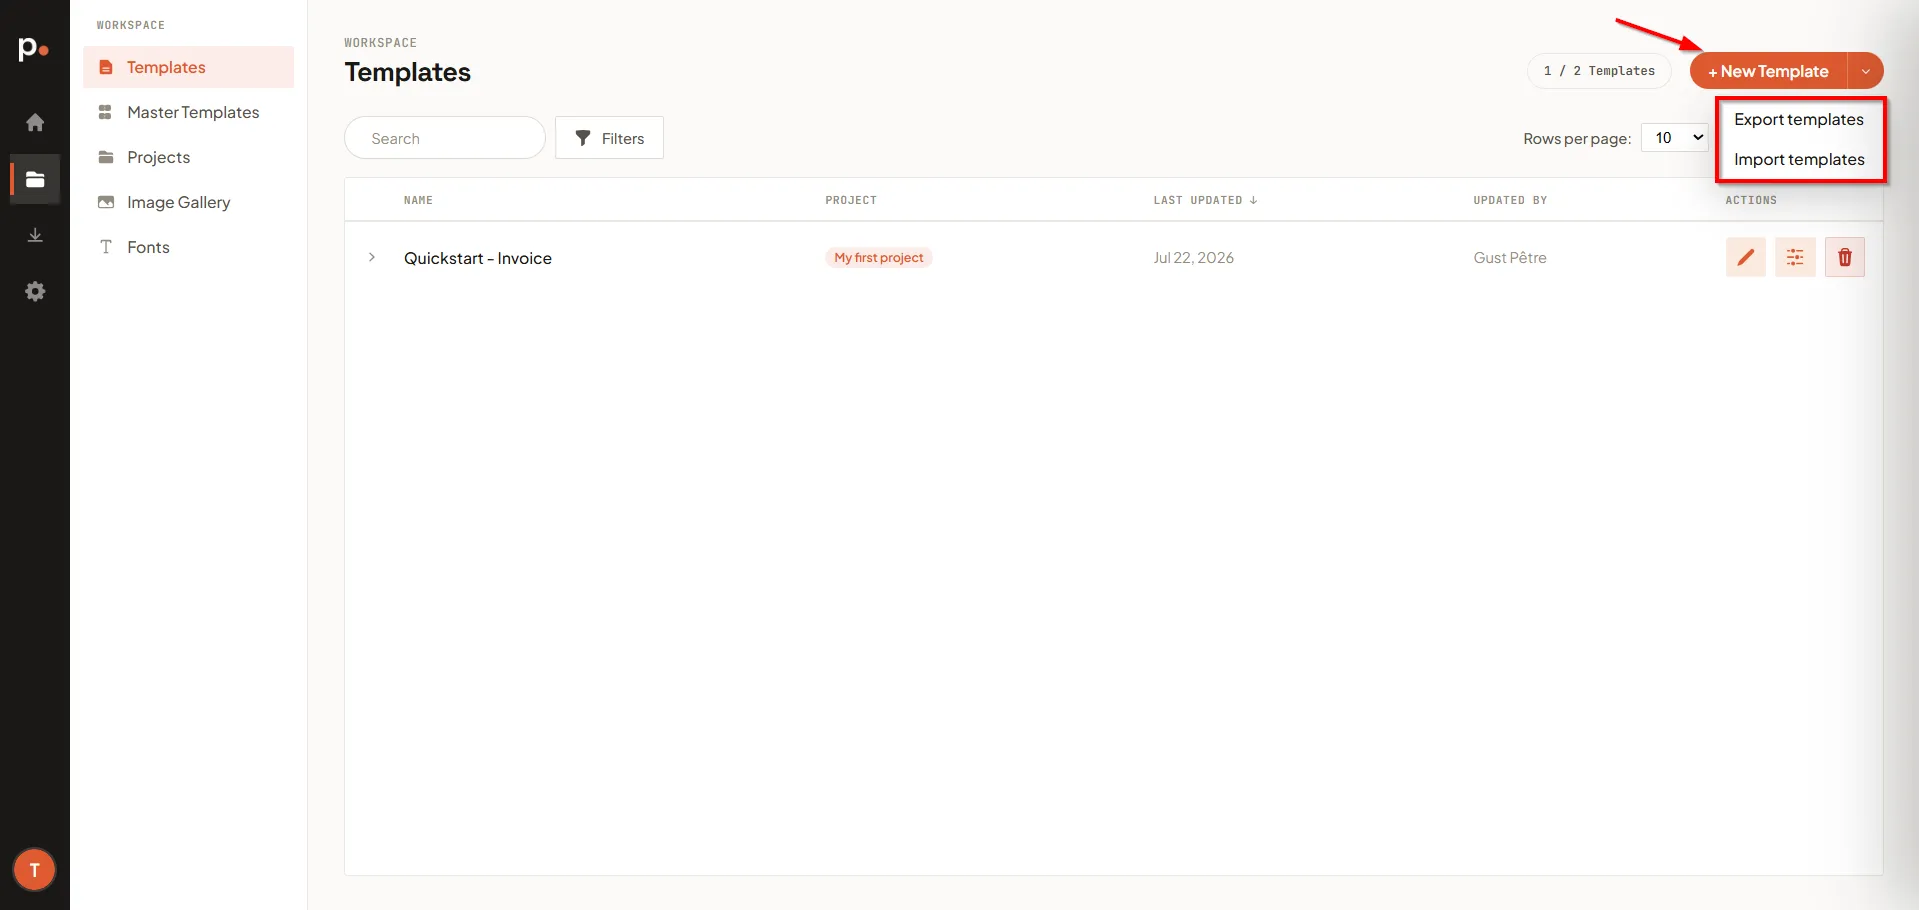
Section titled “The templates list”Each row shows the template’s Name, its Project, when it was Last updated, and who Updated it. Use the Search bar to find a template by name, or Filters to narrow by project.
The counter next to + New Template (for example, “2 / 2 Templates”) shows how much of your plan’s template allowance you’ve used. Once you reach the limit, + New Template is greyed out until you free a slot or upgrade your plan.
Template actions
Section titled “Template actions”Each template row has three actions:
- Edit last version — opens the most recent version in the editor.
- Edit settings — opens an Edit Template panel with the template’s name and its Master template, without opening the editor. Attaching or detaching a master template here is the quickest way to bring an existing template under shared branding, or to release it.
- Delete template — permanently removes the template and all its versions.
Versions
Section titled “Versions”A template can hold several versions, so you can iterate on a design without breaking documents that rely on the current one. Expand a template row (the chevron on the left) to see its versions. For the full draft → publish → render lifecycle, see Versions and publishing.
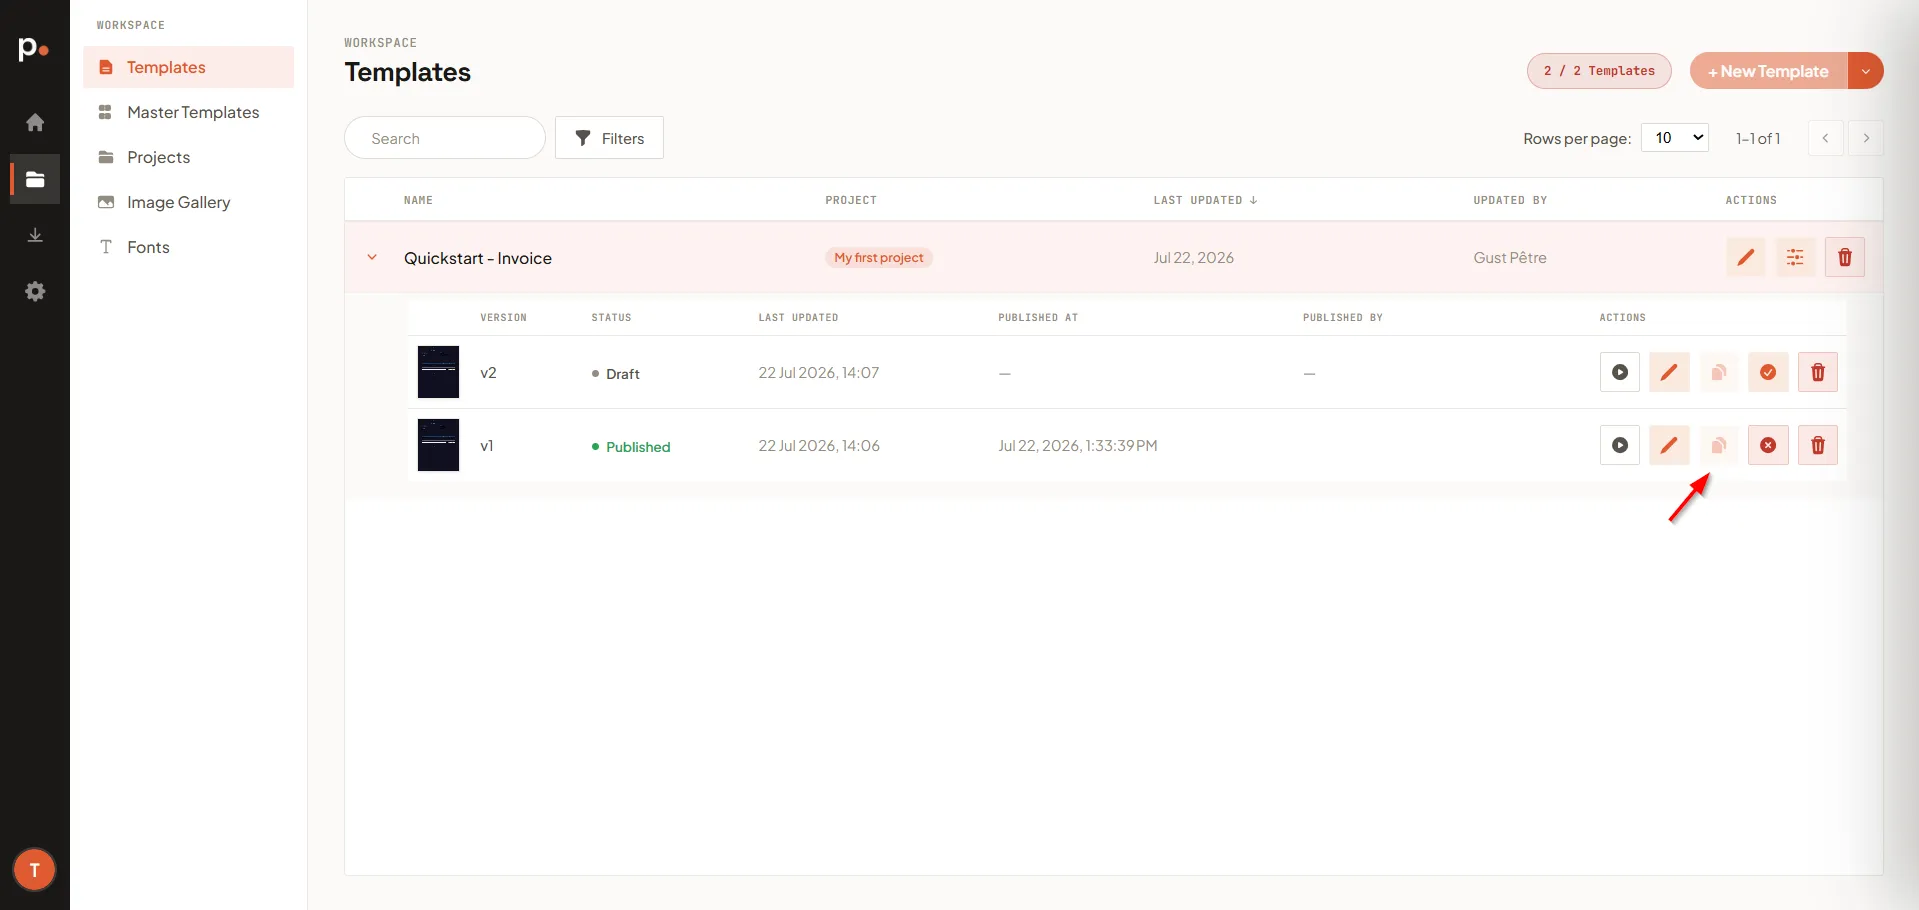
Each version shows its Version number, its Status (Draft or Published), when it was Last updated, and — once published — Published at and Published by. Per version, you can:
- Render — generate a document from this version. See Rendering a template.
- Edit version — open this version in the editor.
- Duplicate version — copy it into a new version to iterate on.
- Publish — mark the version as published so it can be used in your production integration.
- Delete version — remove just this version.
Creating a new template
Section titled “Creating a new template”- Click + New Template.
- Choose the Project the template belongs to.
- Enter a Template name.
- Optionally, base it on a Master template to inherit shared layout and branding — see Master Templates.
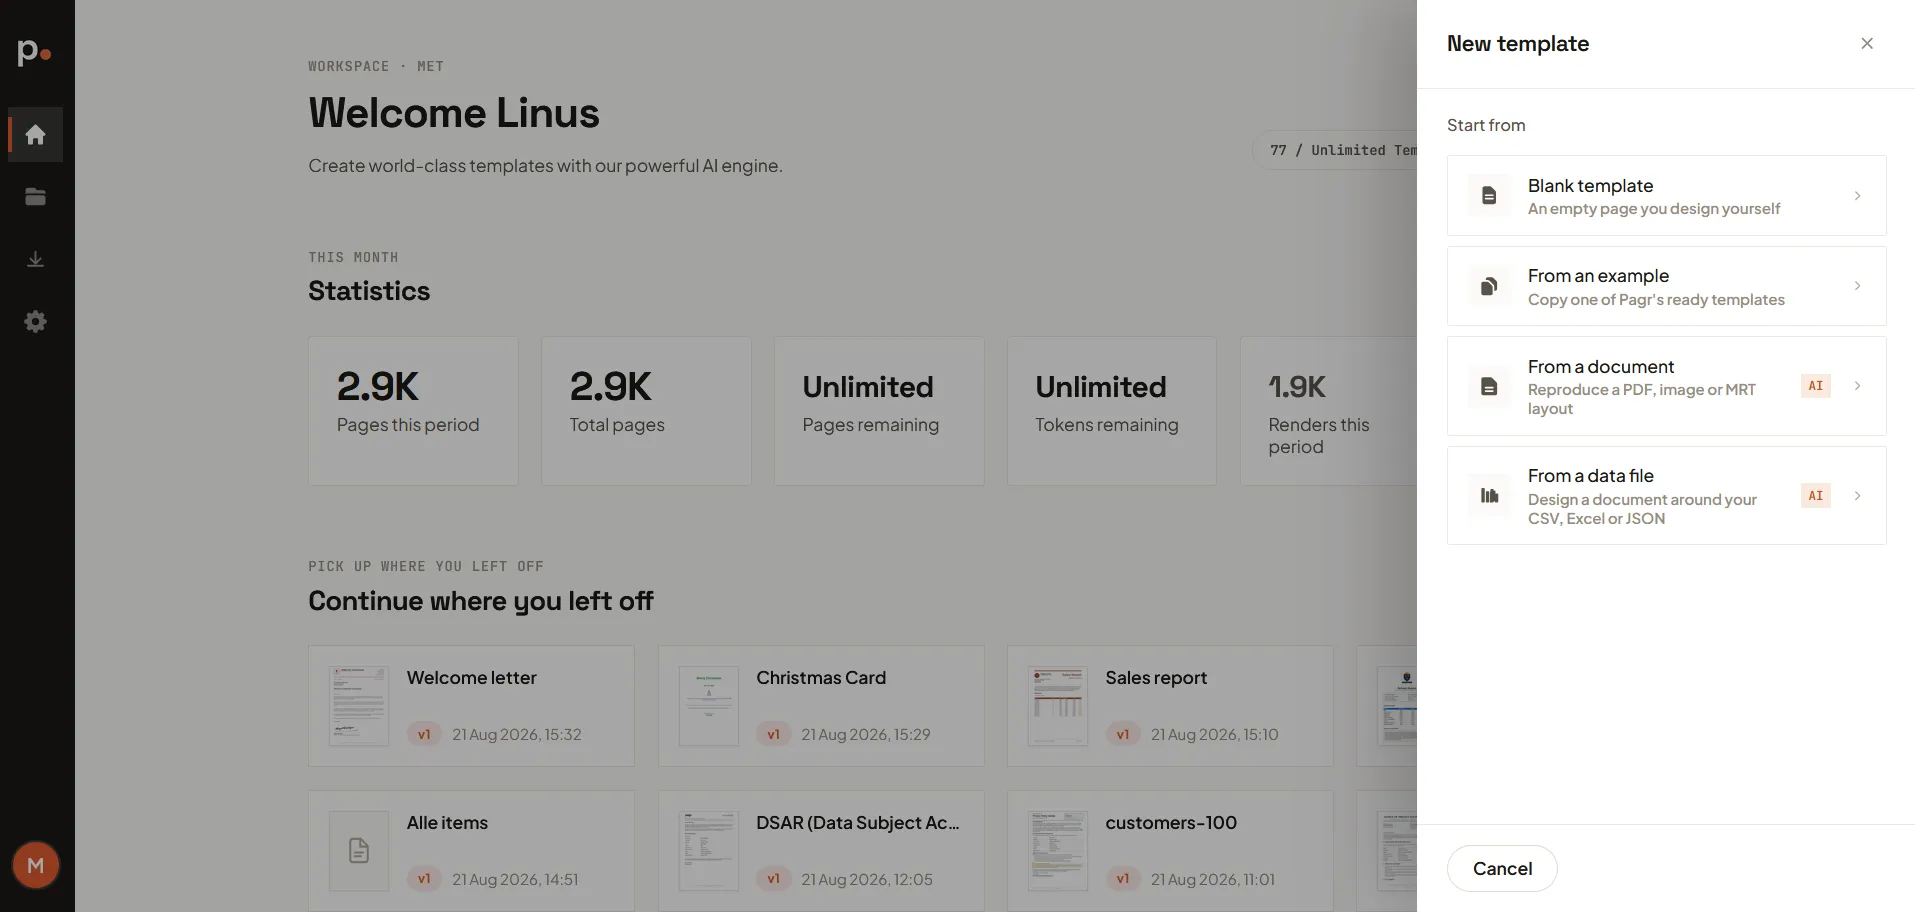
- Choose a Starting point:
- Blank — start with an empty template, then build it yourself or ask the AI Assistant to generate one from a description (“make me an invoice”).
- From example — start from one of Pagr’s ready-made examples (such as a sales report, rental agreement, or welcome letter). They come with sample data already filled in and cost no AI tokens. See Start from an example for the full walkthrough.
- From a document — upload an existing document (PDF, image, or Stimulsoft
.mrt) and let Pagr reproduce its layout as a template. See Generate a template from a document of your own for the full walkthrough. - From data — upload a CSV, Excel, or JSON file and describe the document you want; Pagr designs a template around your fields. See Generate a template from data for the full walkthrough.
- Click Save. The template opens in the editor.
The template editor
Section titled “The template editor”The editor is where you design a template. It has three areas:
-
AI Assistant (left) — describe what you want in plain language and Pagr builds it: generate a whole template from a prompt (“make me an invoice”) or change an existing one (“add a logo to the header”, “make the totals bold”). See Writing good AI prompts for how to get the best results.
-
The template panel (center, in Studio view) — a set of tabs that define the template and its data:
- Template — the template definition itself.
- Sample Data — example values used to fill the template’s variables when you preview or test-render.
- System Data — a read-only reference of placeholders Pagr injects automatically at render time (dates and times,
{{_system.userName}},{{_system.organisationName}},{{_system.templateName}}, and more). - Properties — the output document name. Leave it empty to use the template name, or type
{{to insert a value from the data. - Translations — translated strings, so a template can render in more than one language.
You can edit all of these by hand — see Editing a template by hand for a full walkthrough of the tabs and page setup.
-
Preview (right) — render the template on demand to check the result. Use the Test / Production toggle to choose the environment — see Rendering a template below.
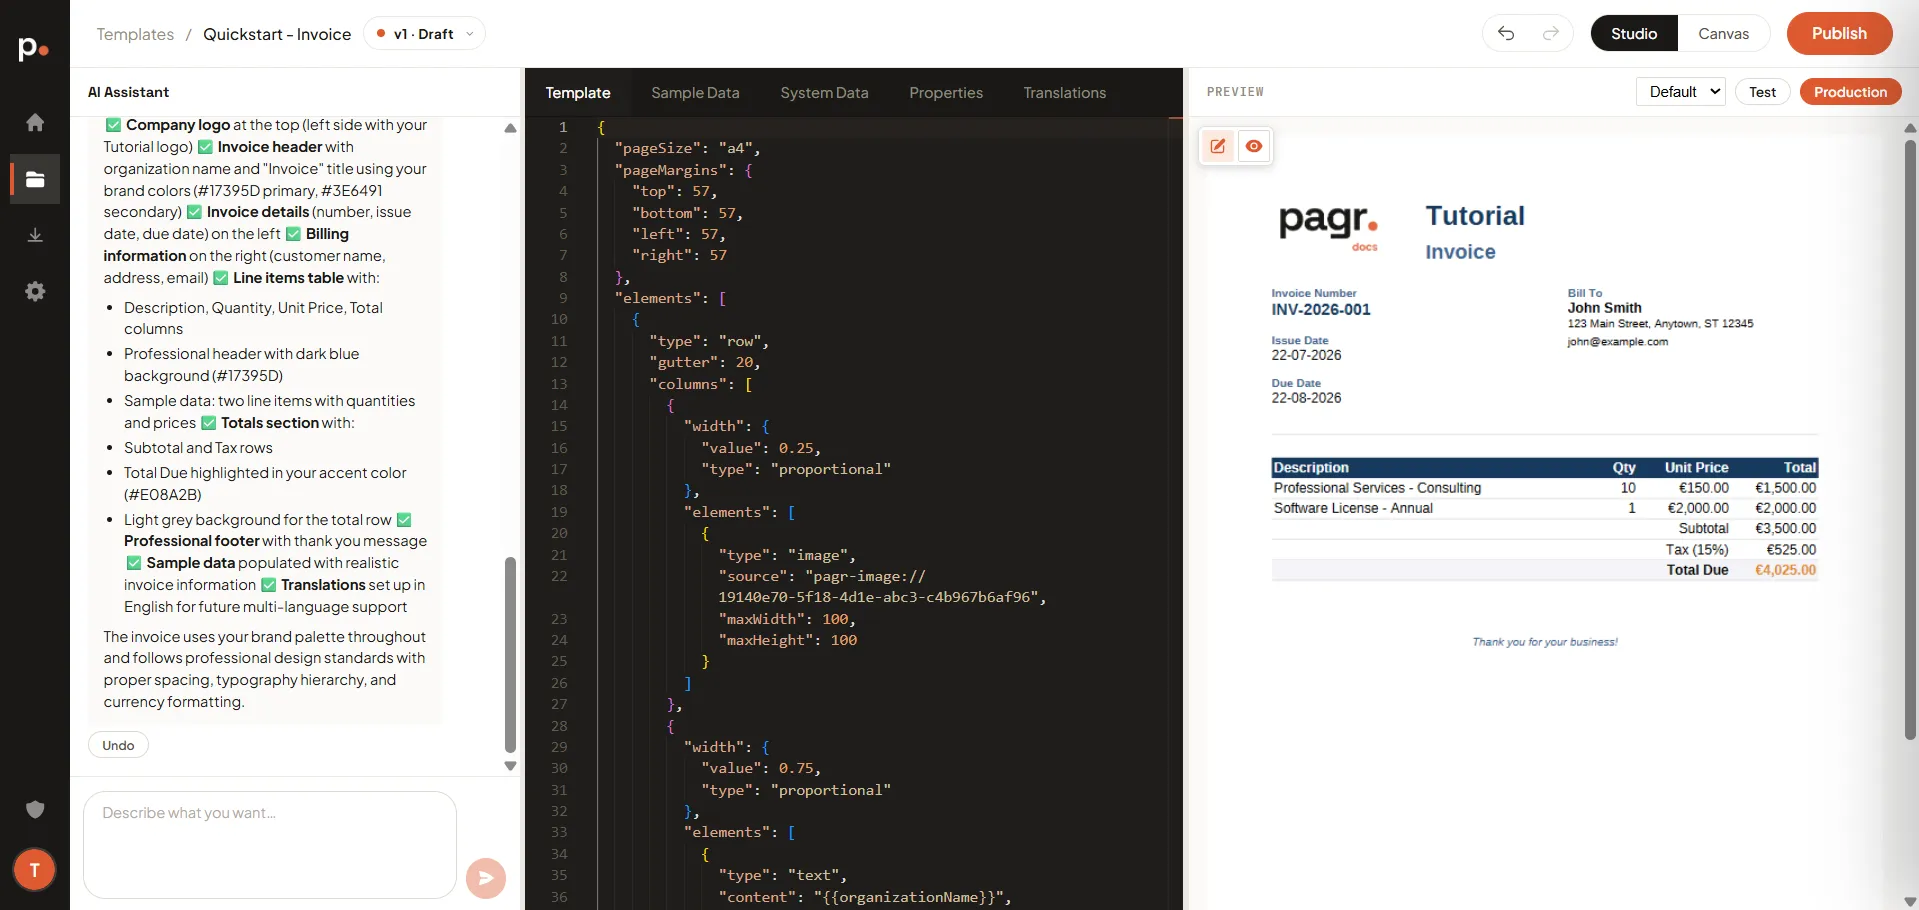
At the top you’ll find the version selector, undo/redo, a Studio / Canvas view toggle, and the Publish button.
Rendering a template
Section titled “Rendering a template”You can render a version in two places:
- From the version row on the Templates list — click the Render action.
- From inside the editor — use the Test / Production toggle in the Preview area.
Either way, Pagr shows a form of the template’s variables, pre-filled with the sample data. Fill in the values you want, then click Render.
Pagr renders in two environments:
- A Test render adds a watermark to the output and does not count toward your page credits — ideal while you’re still designing.
- A Production render produces the final, unwatermarked document and counts toward your plan’s page render credits.
Both test and production renders appear under Output → Renders — the Environment column shows which — and each render operation is logged under Render Events.
Exporting and importing templates
Section titled “Exporting and importing templates”Click the arrow next to + New Template to Export templates or Import templates — useful for backing up your work or moving templates between organisations.
Related articles
Section titled “Related articles”- Editing a template by hand — the editor’s tabs, page setup, and manual editing.
- Writing good AI prompts — build and change templates by describing what you want.
- Generate a template from data — upload a data file and let the AI design a template around it.
- Master Templates — share layout and branding across templates.
- Projects — organise templates into projects.
- Renders — the documents your templates produce.
- Image Gallery and Fonts — reusable assets for your templates.