
Generate a template from data
Already have the data but not the document? Upload a CSV, Excel, or JSON file, describe what you want in a sentence or two, and Pagr’s AI designs a template around your fields — turning a spreadsheet of records into a ready-to-render document.
It’s one of the four Start from options in the New template panel, alongside Blank template, From an example, and From a document. Like From a document, its tile is badged AI — an AI model designs the layout, so it spends AI tokens.
What you can upload
Section titled “What you can upload”Drop a file onto the upload area, or click to browse. Pagr accepts:
- A CSV file
- An Excel spreadsheet
- A JSON file
The file must be 10 MB or smaller. Pagr reads the file’s columns (or JSON fields) and infers a type for each one — text, number, or date.
Generate the template
Section titled “Generate the template”-
On the Templates page, click + New Template (you can also start from the Dashboard).
-
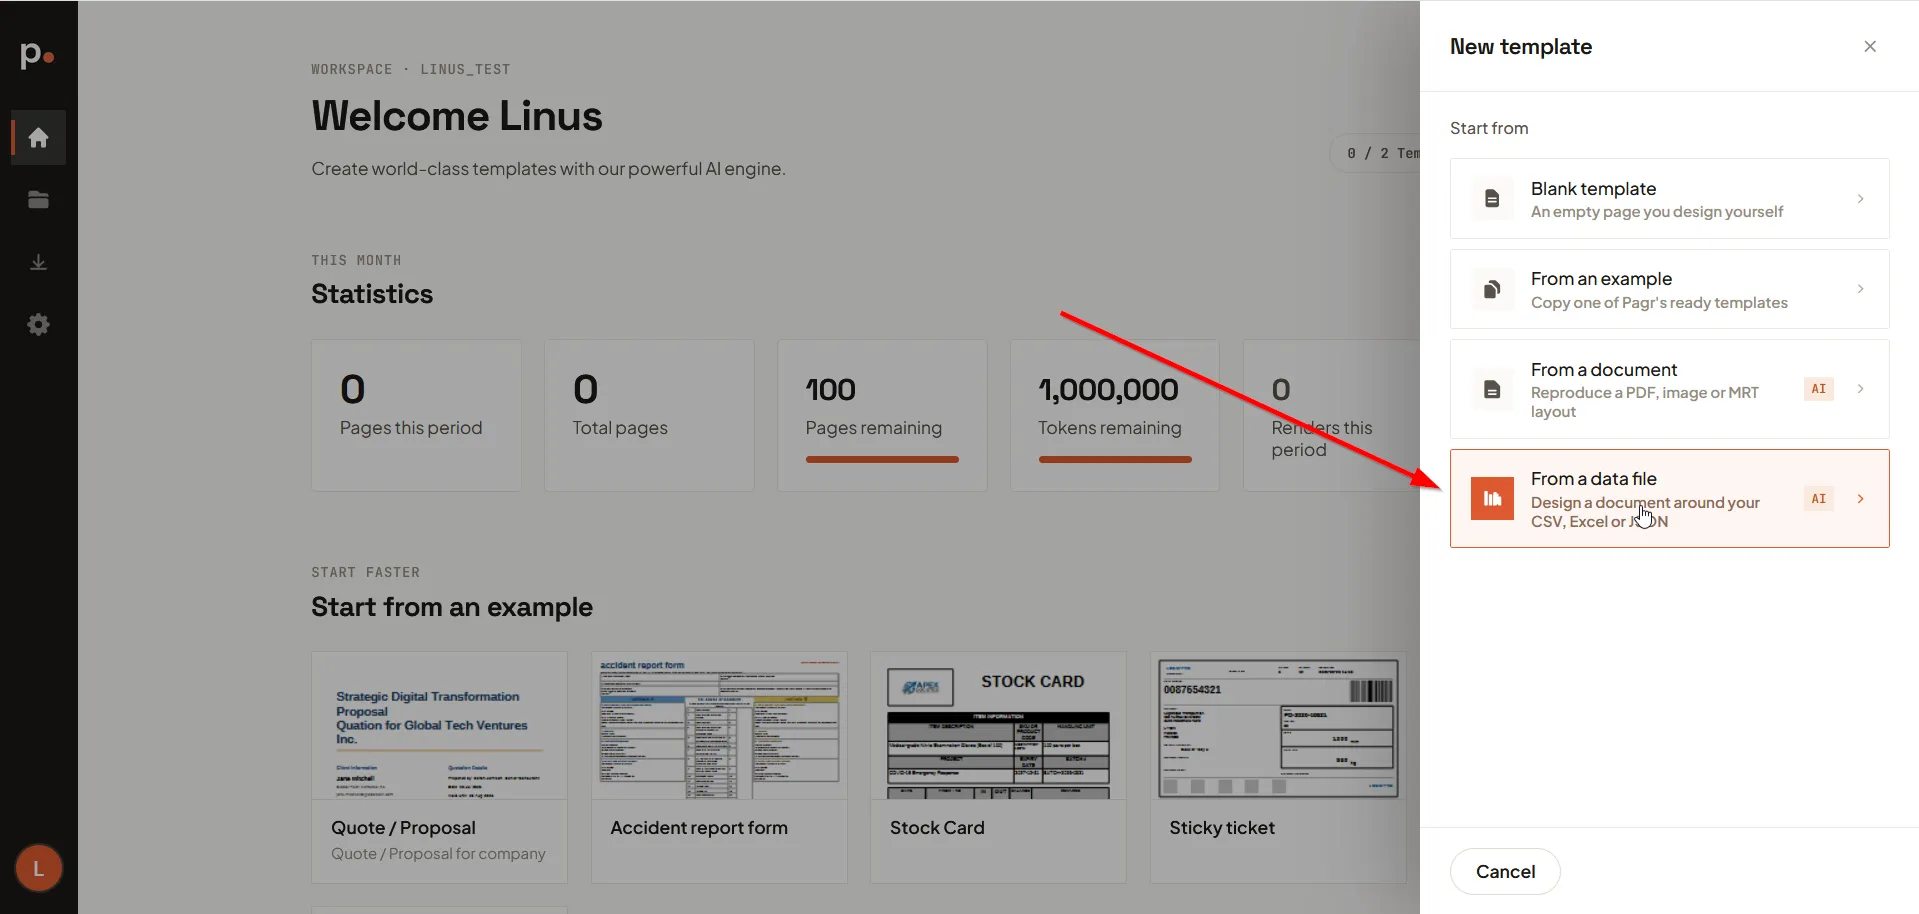
Under Start from, choose From a data file — “Design a document around your CSV, Excel or JSON”.
-
Upload your data file — drag it onto the upload area or click to browse and pick it from your device.
-
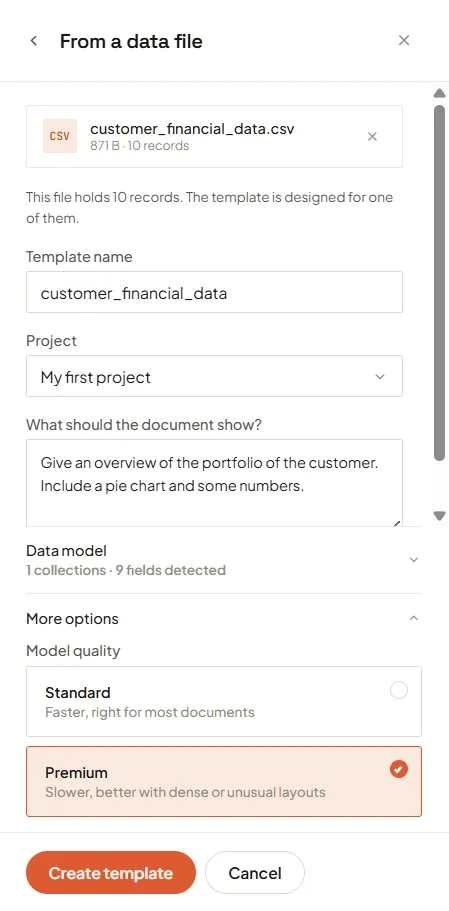
Check the details and generate. Pagr shows the file with its size and record count, fills in the Template name from the filename — change it if you want — then choose the Project the template belongs to and describe the document under What should the document show?. Data model summarises the fields Pagr found; expand it to check them. Open More options if you want to pick a different Model quality. Click Create template to start.
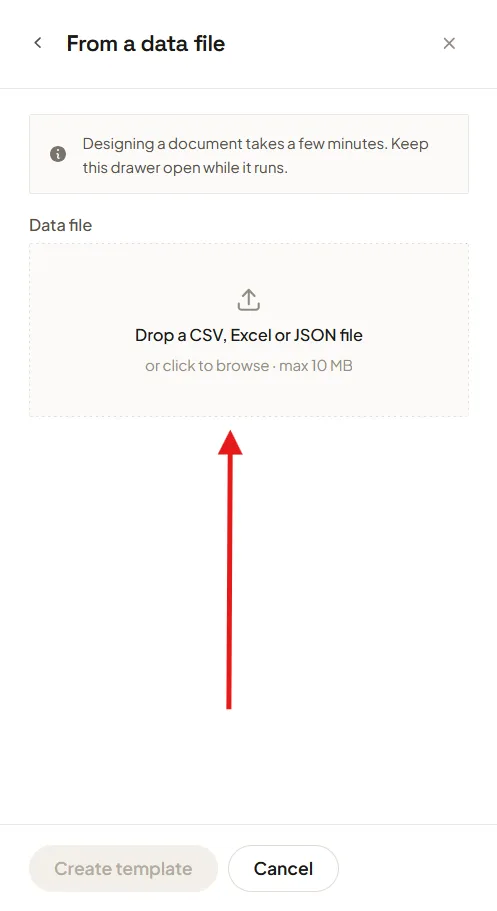
Create template stays greyed out until you’ve attached a file — so if you can’t click it, start with the upload.
Your description is the only thing the AI has to work from, so the more specific you are about tone, sections, and layout, the closer the first result will be — for example “Give an overview of the portfolio of the customer. Include a pie chart and some numbers.” It’s also saved as the template’s description.
Choose a better AI model
Section titled “Choose a better AI model”Under More options, Model quality decides which AI model designs your document:
- Standard — faster, and right for most documents.
- Premium — slower, but better with dense or unusual layouts. It’s a larger model with more room to work in, so it holds a file with many fields or an intricate layout together where Standard starts simplifying.
Premium is only offered on plans that include it. On a plan without it there’s nothing to choose — the option simply isn’t shown, and every generation uses Standard. See Billing for what your plan covers.
After it’s generated
Section titled “After it’s generated”When generation finishes, the new template opens in the template editor with your description turned into a full layout, each of its placeholders already bound to a field from your file.
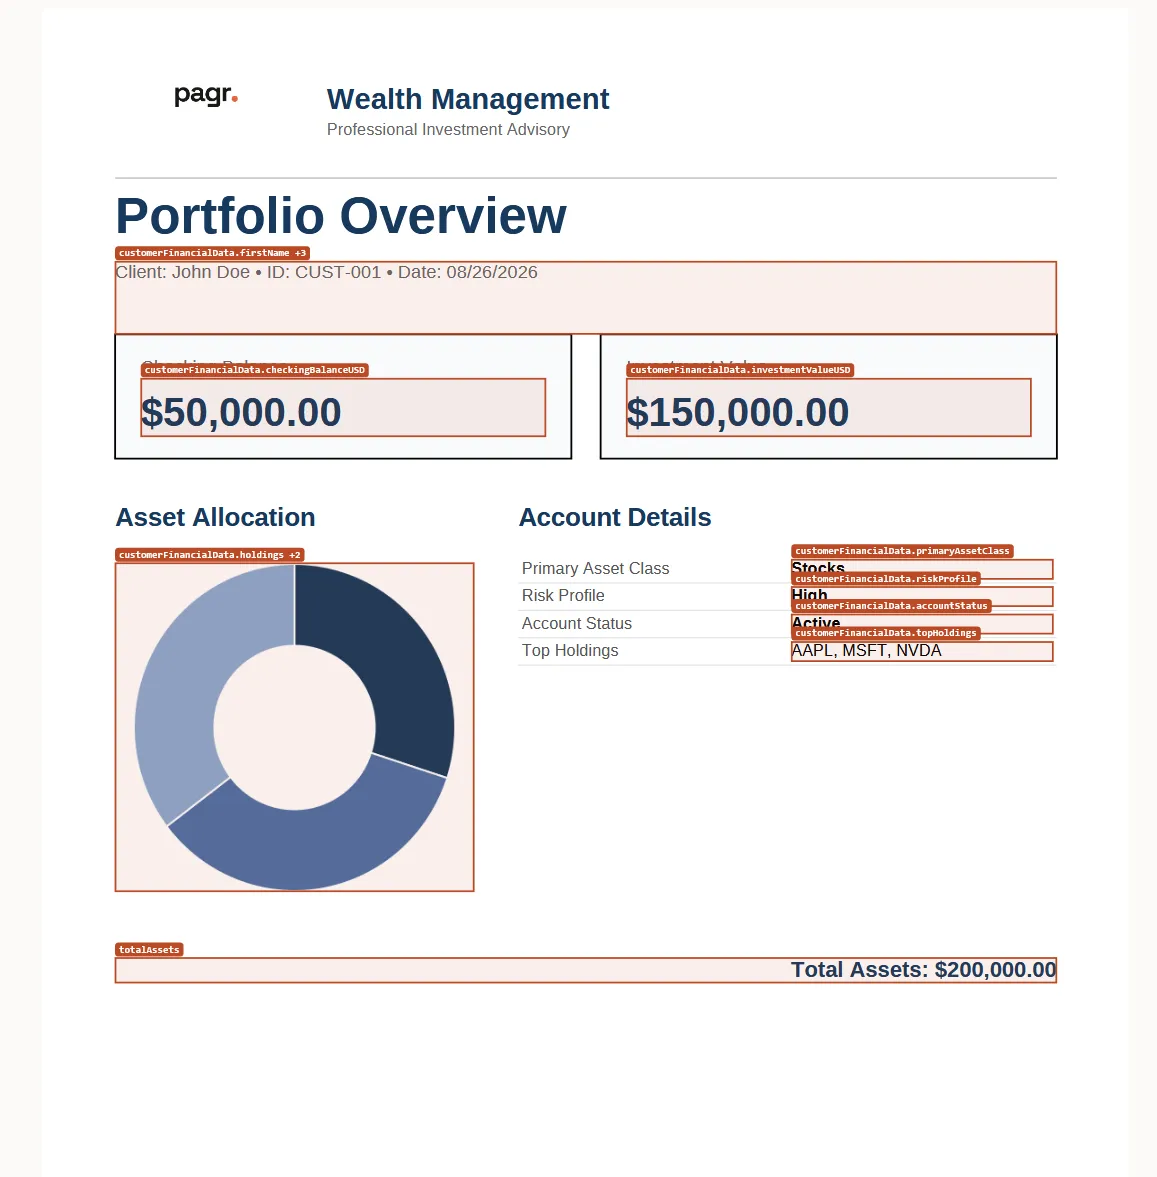
From here it behaves like any other template:
- Refine the layout and wording with the AI Assistant (“add the report reference to the header”, “make the record table wider”).
- Adjust the document name on the Properties tab — see Naming rendered documents by record below.
- Render it to produce documents, and publish a version once you’re happy.
Rendering many documents at once
Section titled “Rendering many documents at once”Because the template is bound to a single record, rendering it once — from the version row on the Templates list, or from Test / Production in the editor — produces one document from the sample data.
To generate a document per row instead, open the render dialog and attach the same kind of file under Data file (optional):
-
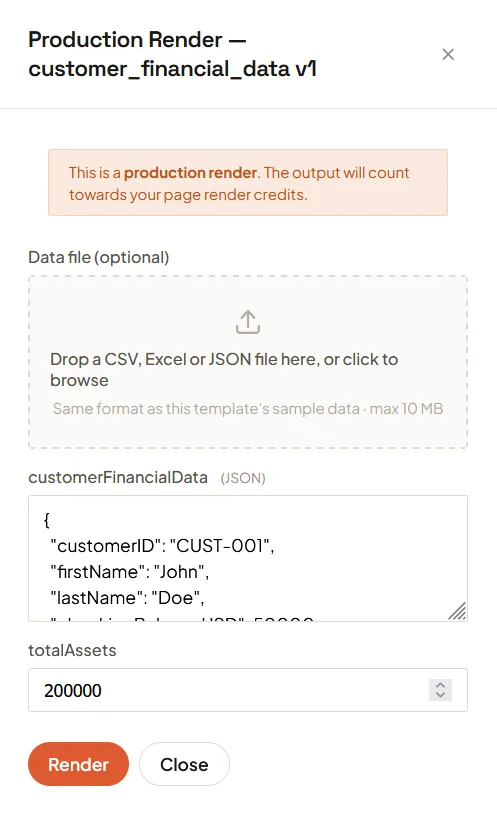
With no file attached, Pagr renders a single document from the template’s own sample data. The dialog shows an editable box per top-level field — a JSON box for a collection, a plain input for a single value — so you can tweak the record before rendering.
-
Attach a CSV, Excel, or JSON file in the same shape as the template’s sample data, and Pagr detects every row, confirms how many documents it will produce, and changes the button to Render N documents.
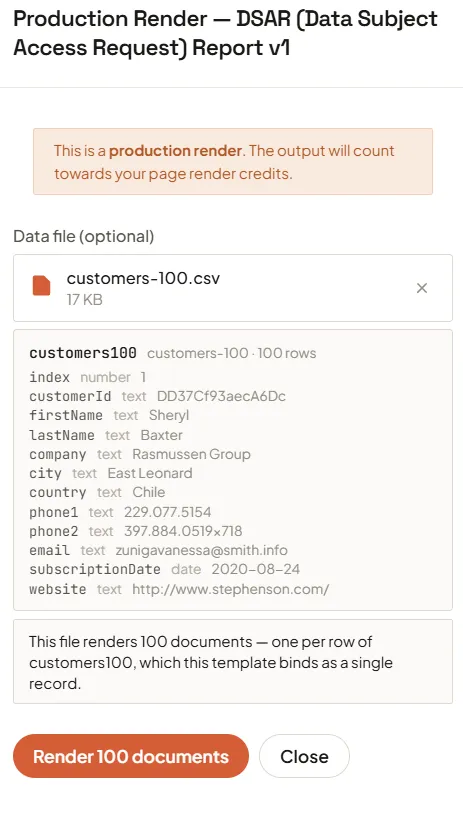
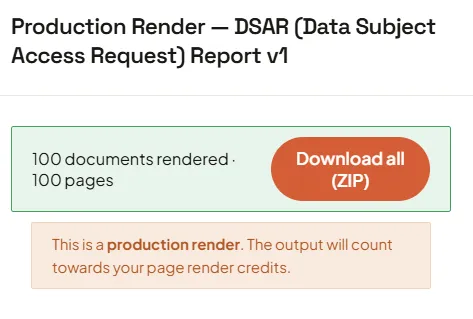
Click it, and Pagr renders one document per row. When it finishes, download every document at once as a single archive.
Naming rendered documents by record
Section titled “Naming rendered documents by record”With one render producing many documents, giving them all the same name isn’t useful. On the Properties tab, set the Document name to include a placeholder from your data — a fixed prefix plus a field that differs per record, like DSAR_{{customers100.index}} below — so each rendered file is named after its own record instead of colliding on the template name.
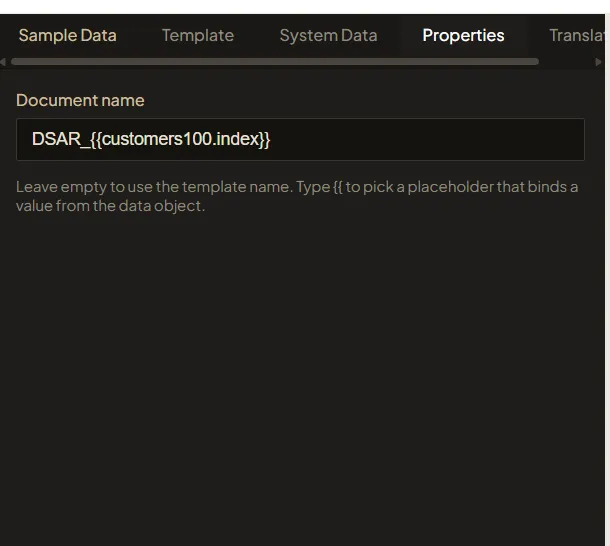
Type {{ in the field to pick a placeholder from the data object, the same way you would for any other template. See Editing a template by hand.
Related articles
Section titled “Related articles”- Templates — versions, the editor, rendering, and publishing.
- Writing good AI prompts — refine the generated layout by describing changes.
- Generate a template from a document of your own — start from an existing document instead of a data file.
- Start from an example — pick a ready-made template instead.
- Variables and the data model — how the fields Pagr detected become the template’s variables.
- Renders — where both single and bulk render output shows up.